Build conda environment and add Jupyter kernel
Build conda environment
Make sure you have completed the VSCode set-up before creating the environment.
Open VSCode on your computer.
Download the following YAML file and move it into your
eds220-in-classdirectory: https://github.com/MEDS-eds-220/MEDS-eds-220-course/blob/main/eds220-env.ymlOpen a bash terminal inside VSCode and in it:
Verify you are in the
eds220-in-classdirectory.Verify that the
eds220-env.ymlfile is in the directory.Run the following conda command to build the environment used for the course:
conda env create --name eds220-env --file eds220-env.yml
It can take up to a few minutes to build the environment. Once conda has finished, verify that the environment was created by running conda env list.

Add Jupyter kernel
Make sure you have built the eds220-env before creating the kernel.
Open VSCode on your computer.
Add a new bash terminal in it.
Verify you have the
eds220-envconda environment available by running
conda env list- Activate the
eds220-envby running
conda activate eds220-envVerify the environment has been activated.
Run
python -m ipykernel install --user --name eds220-env --display-name "EDS-220 env"- Verify that the kernel has been created by running
jupyter kernelspec listThe output should look similar to this:
Available kernels:
  eds220-env        /Users/galaz-garcia/Library/Jupyter/kernels/eds220-env
  python3           /Users/galaz-garcia/opt/anaconda3/share/jupyter/kernels/python3
Close and reopen VSCode.
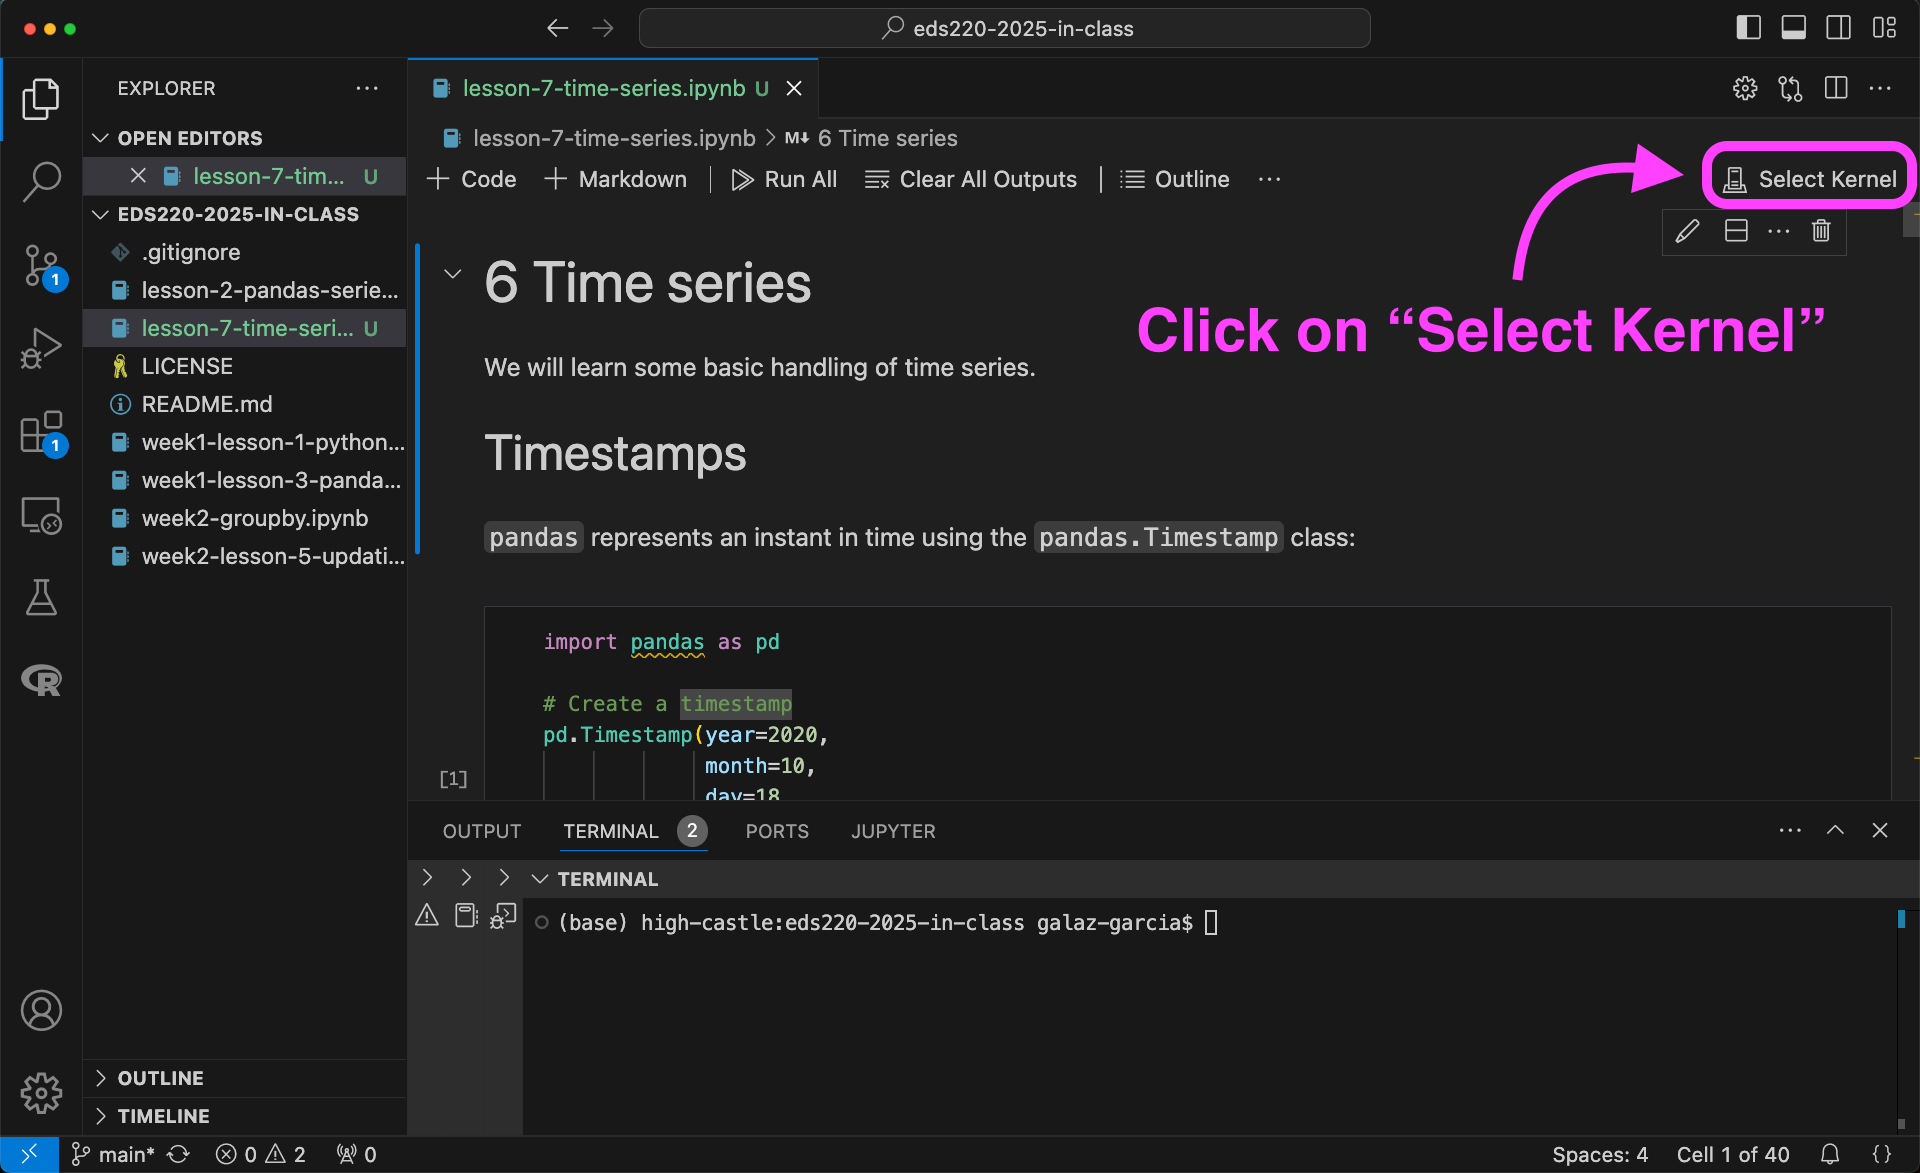
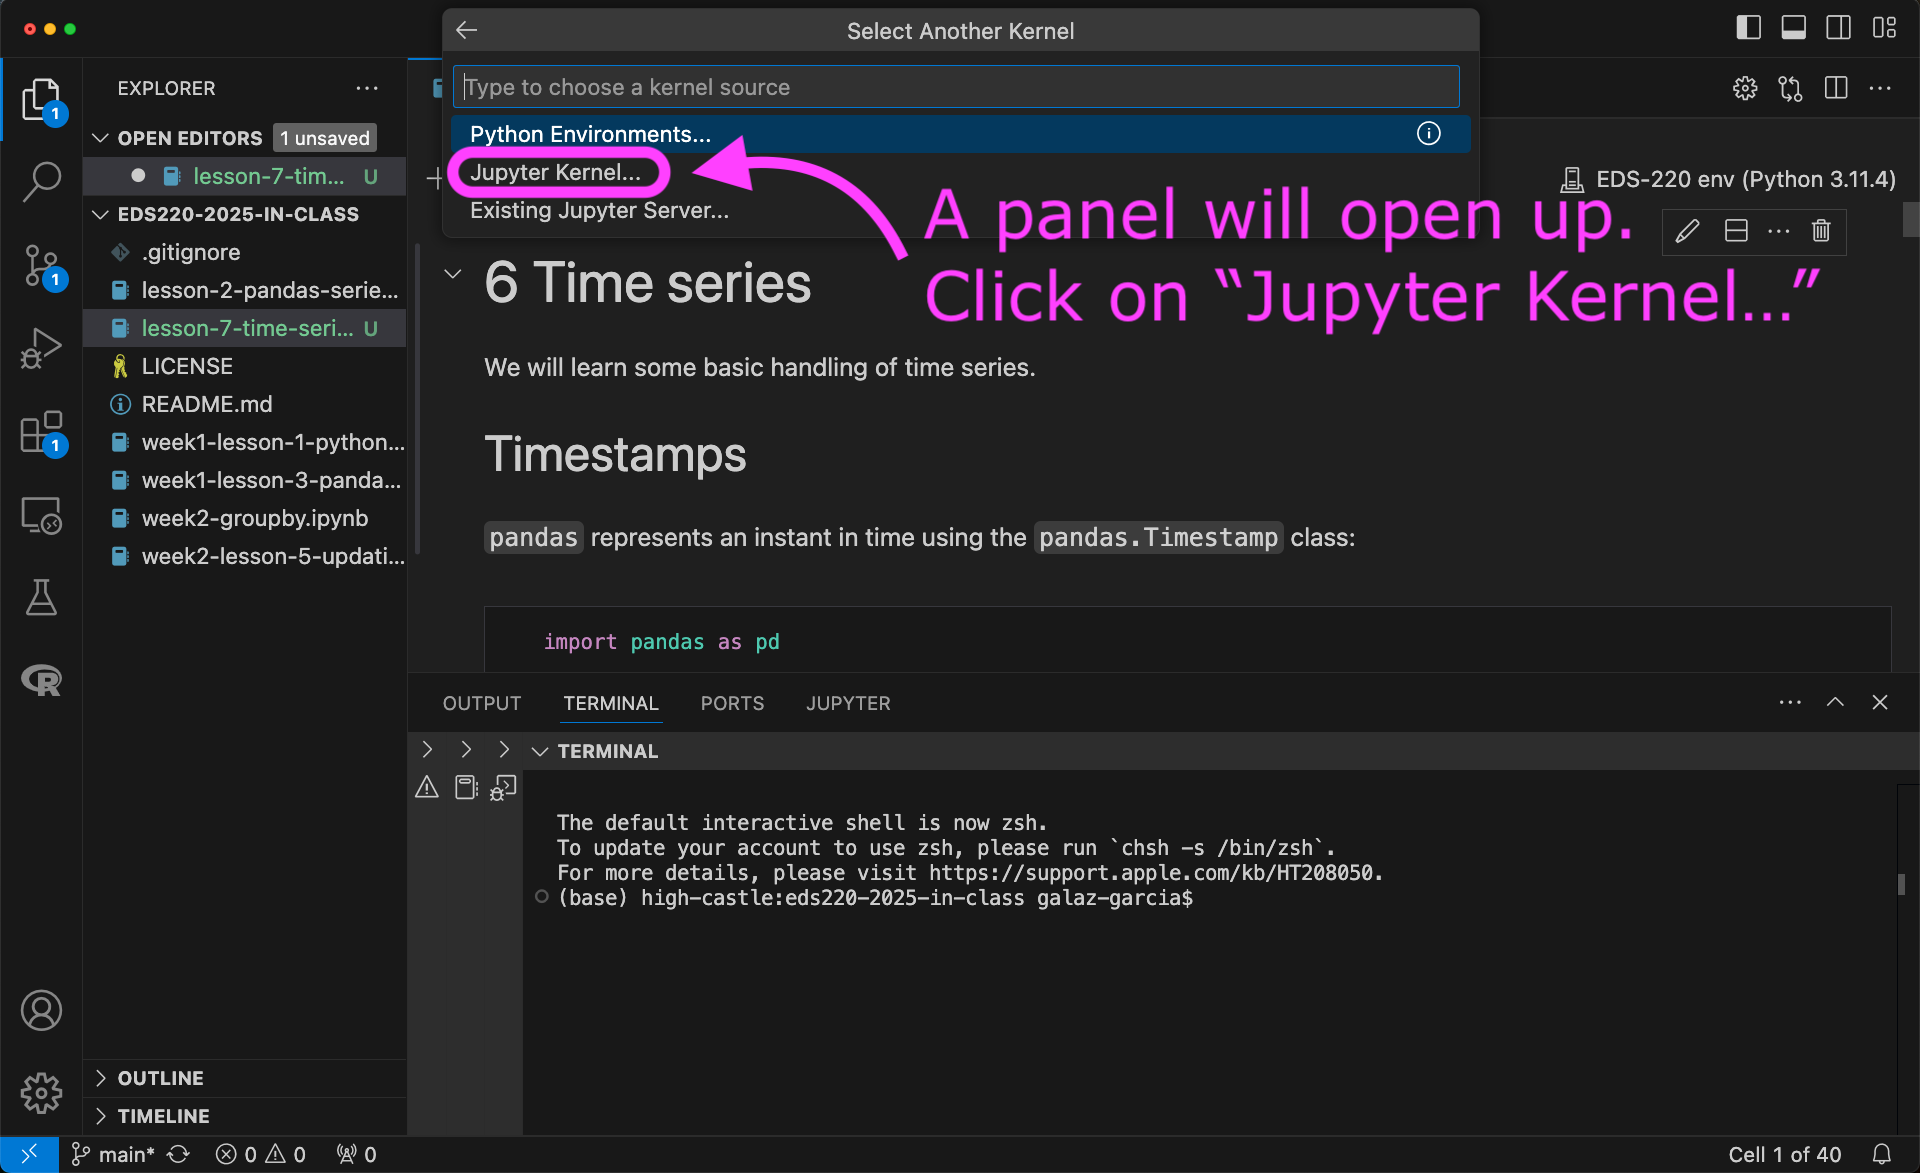
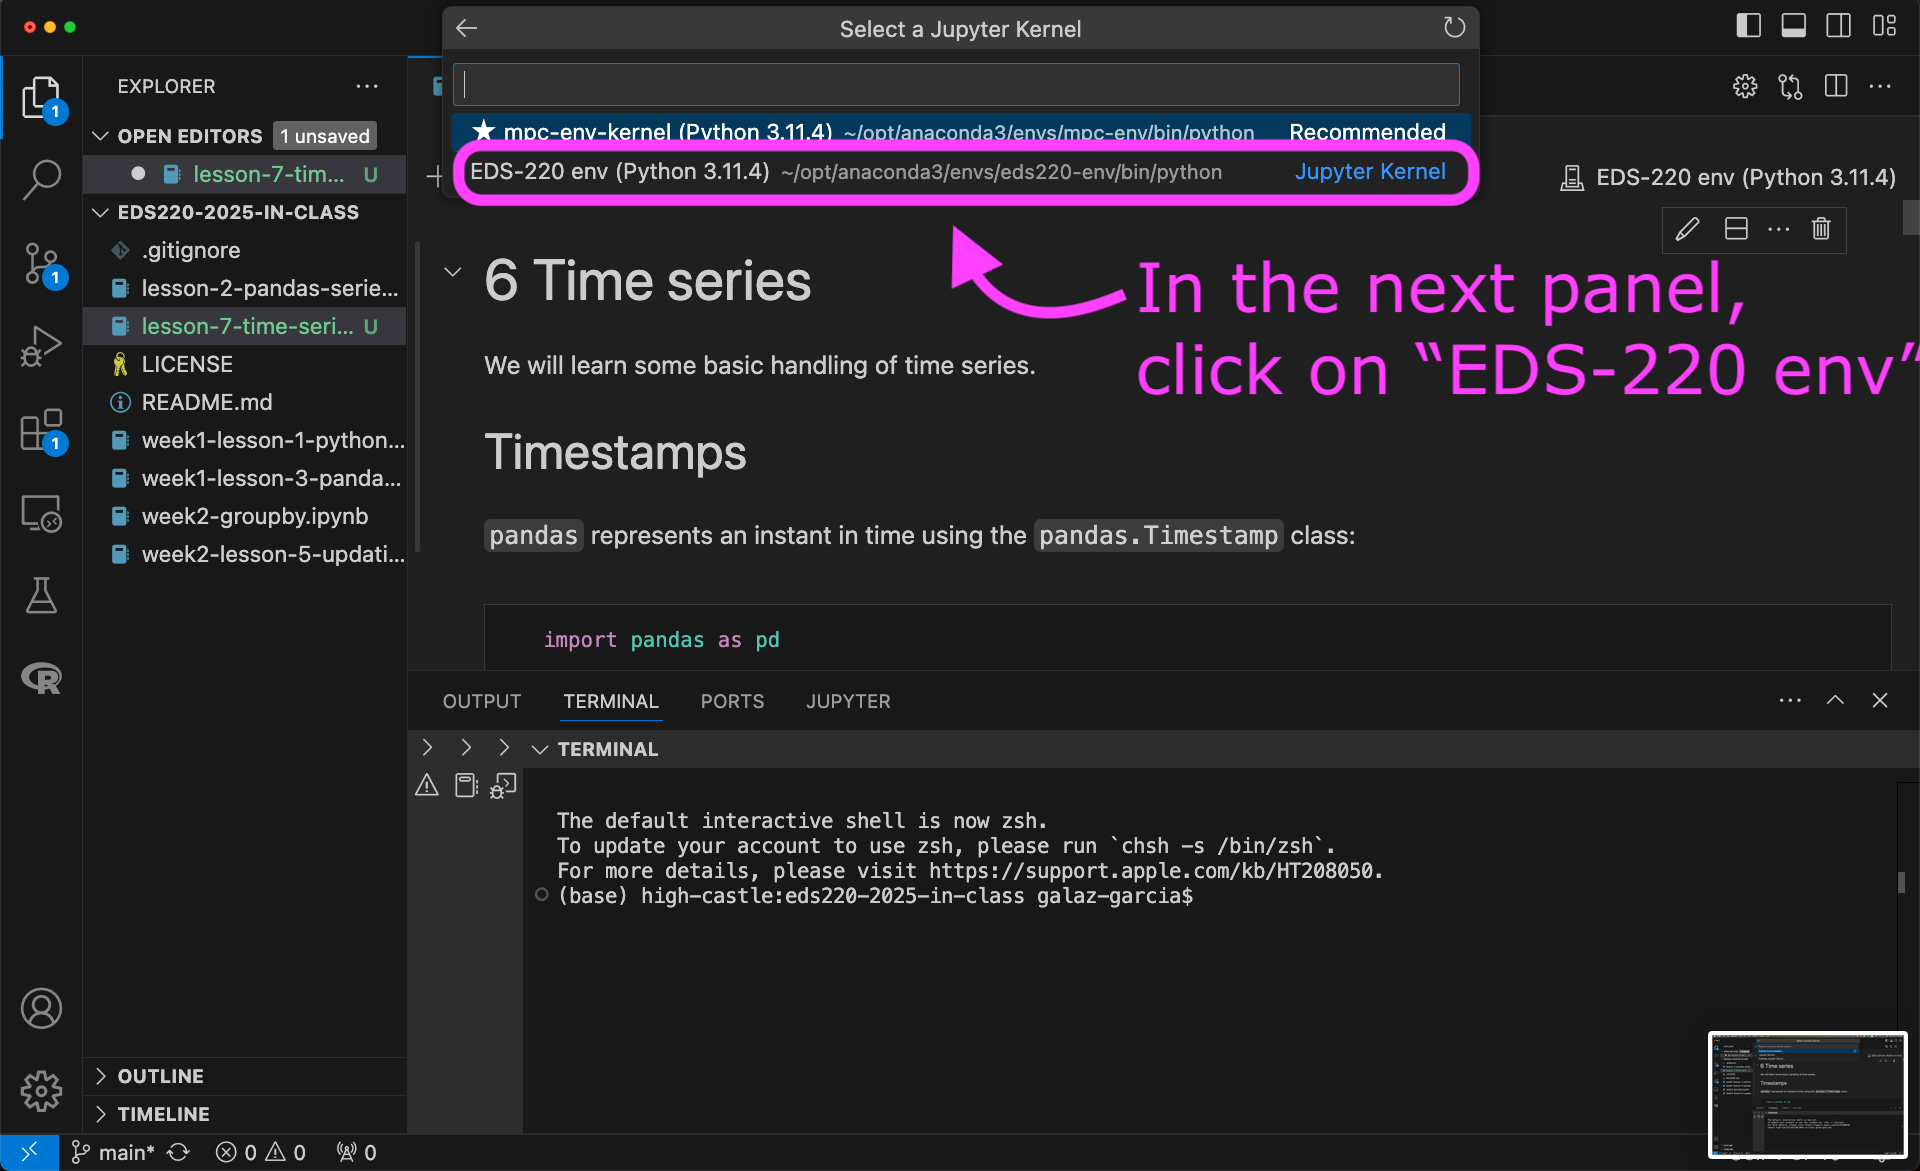
To use the new kernel, open a Jupyter notebook on VSCode and…