VSCode set-up
First steps
Create a
MEDS/EDS-220directory in your personal computer if you don’t have one yet.Open VSCode.
Confirm git installation
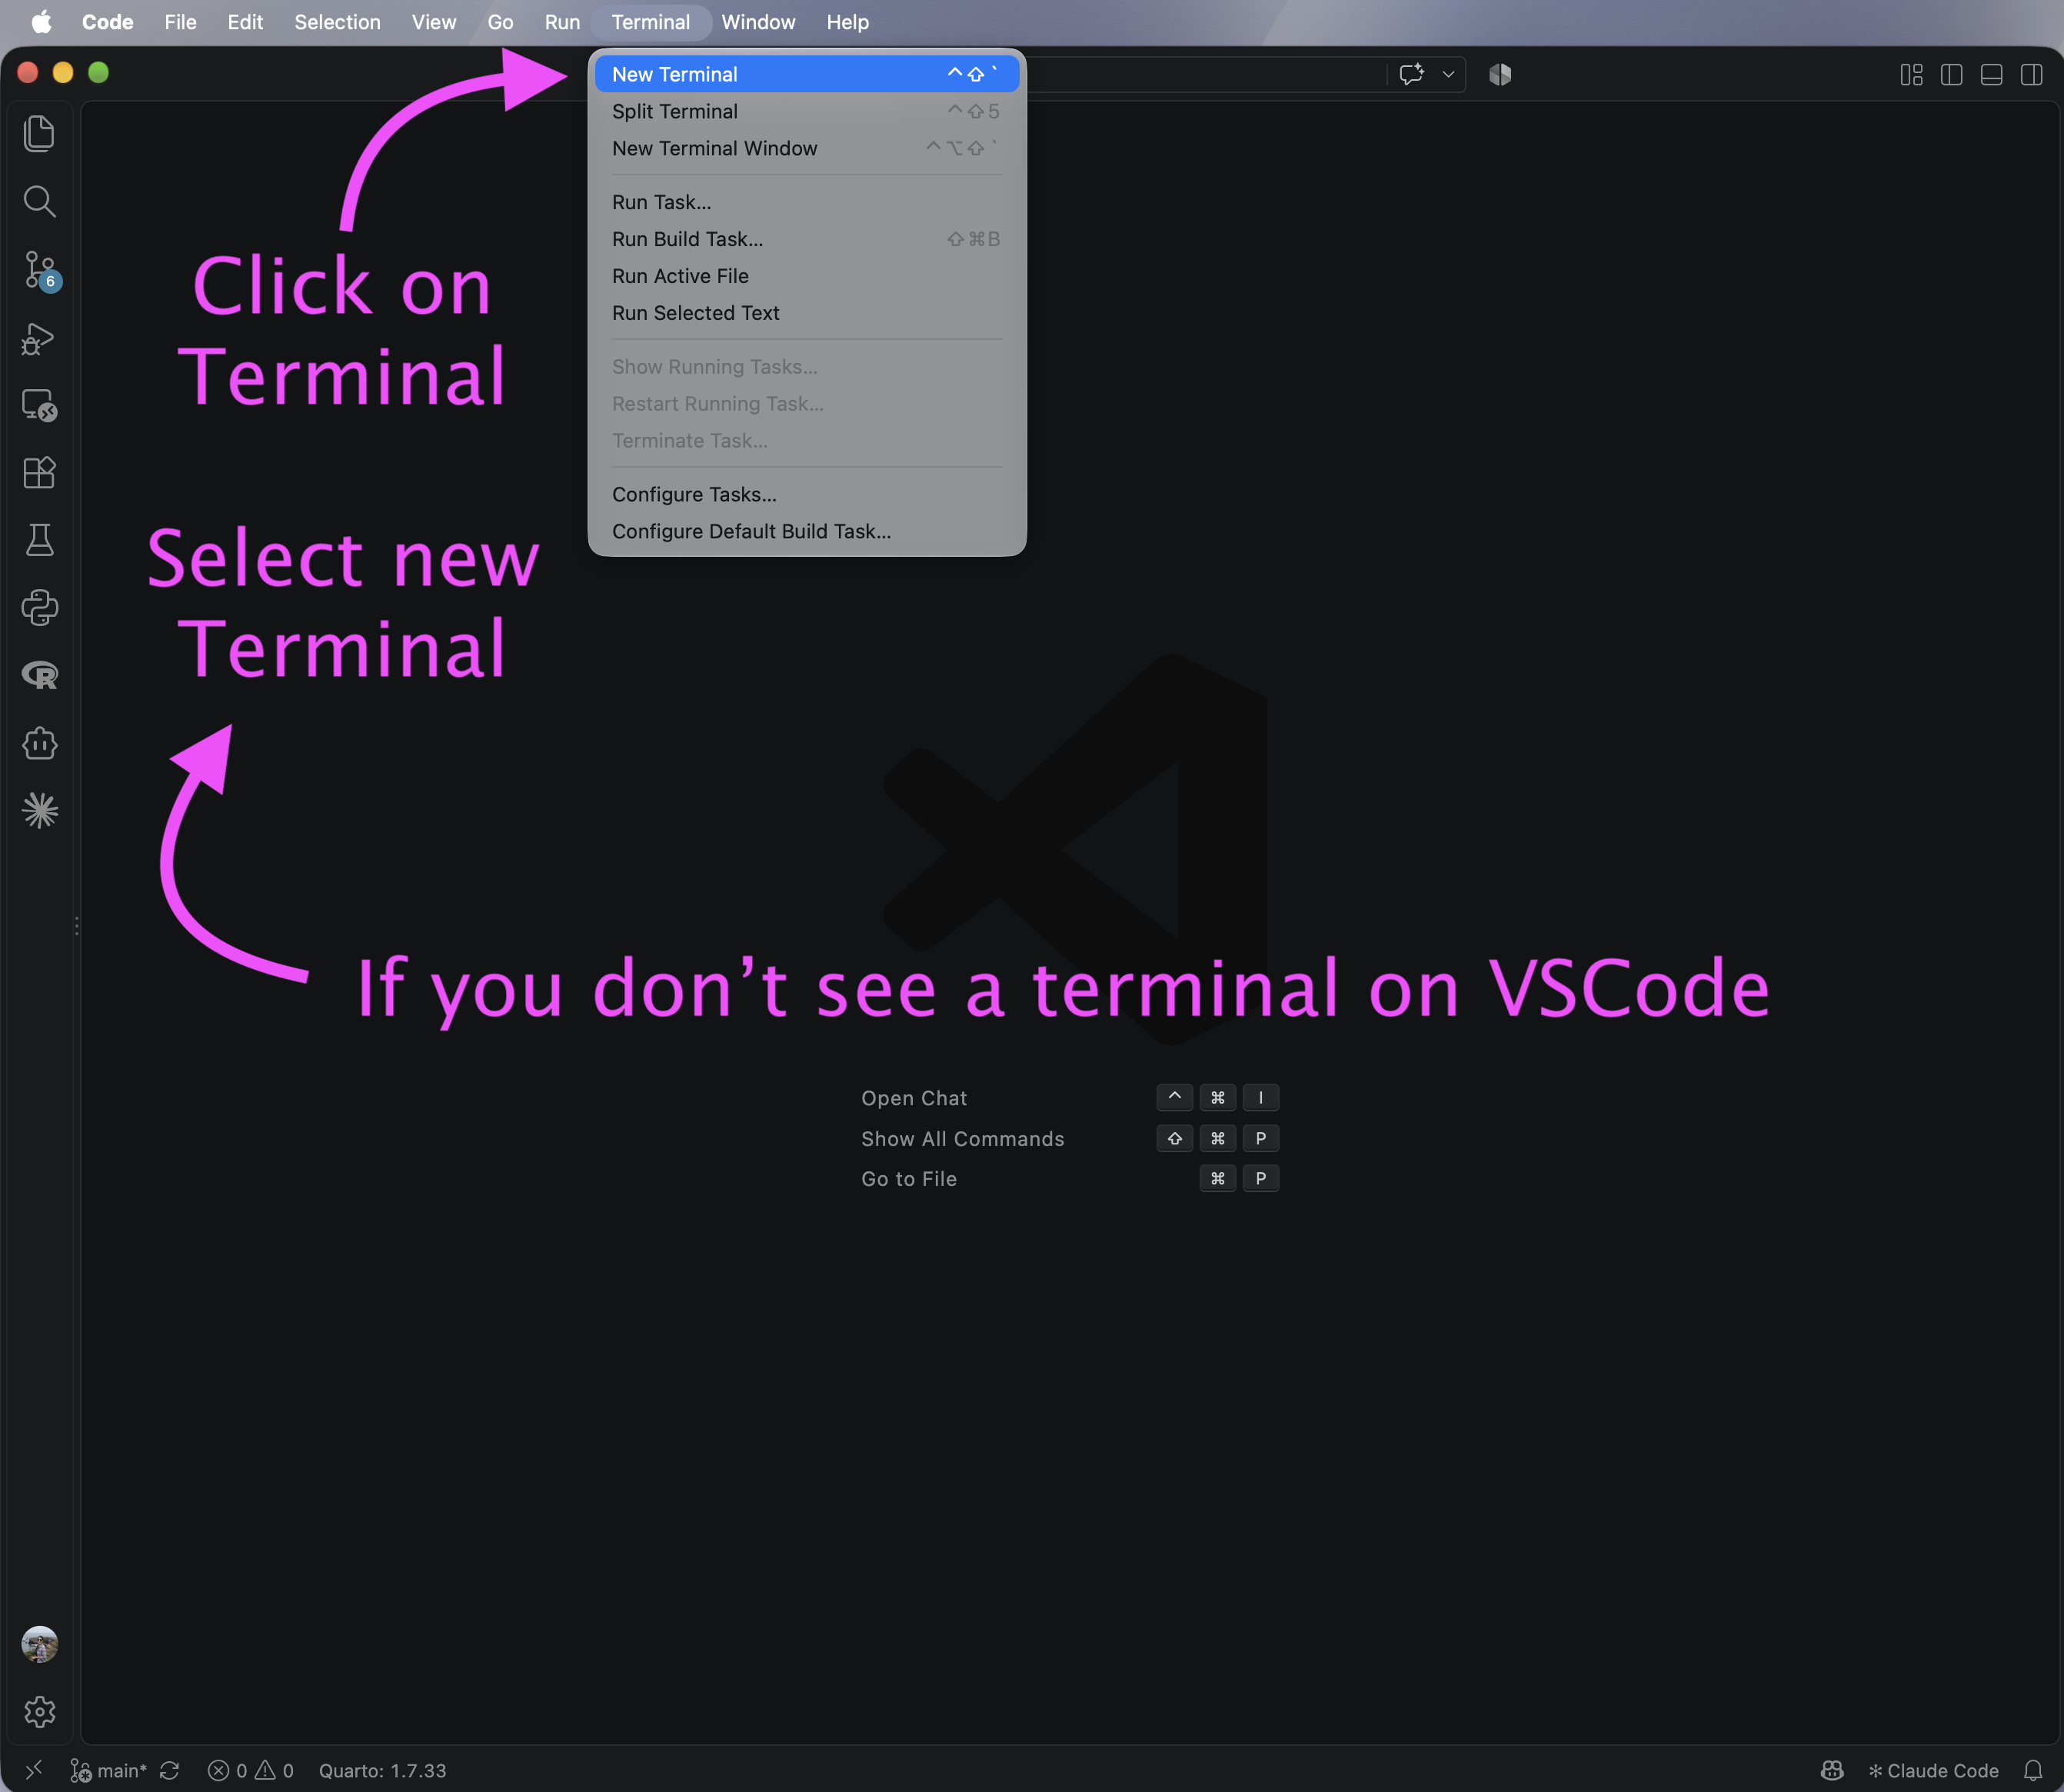
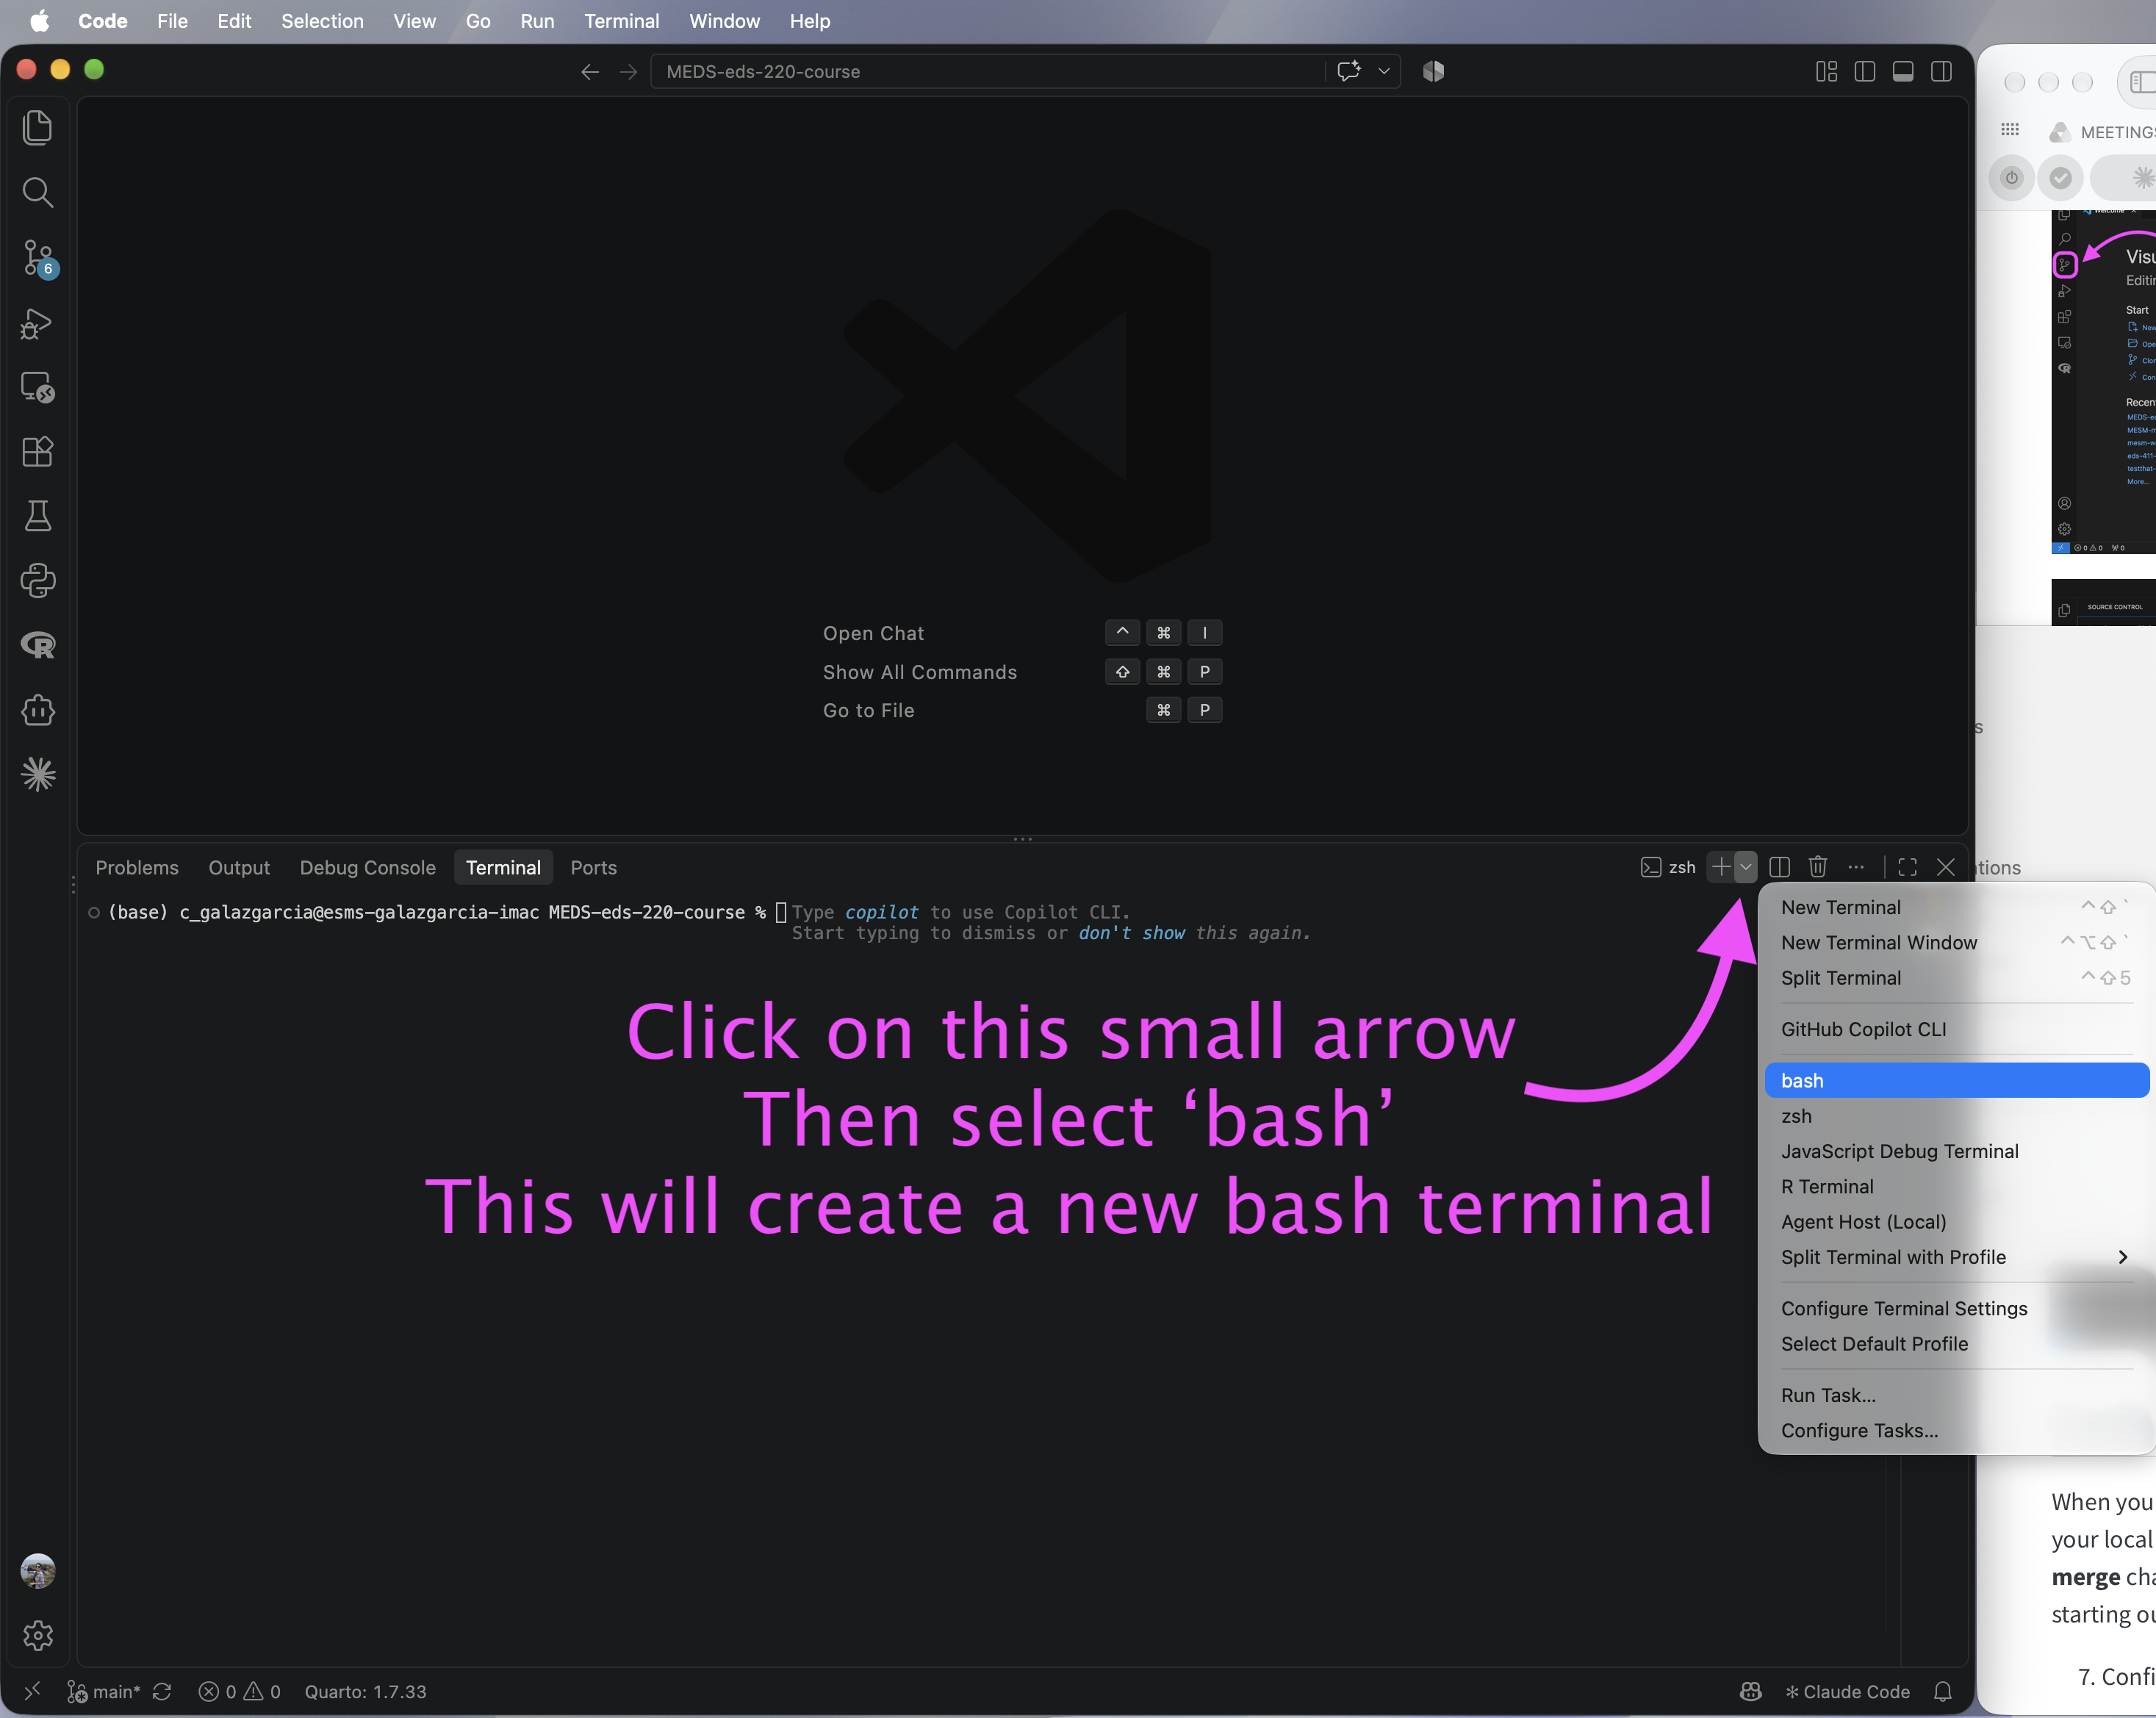
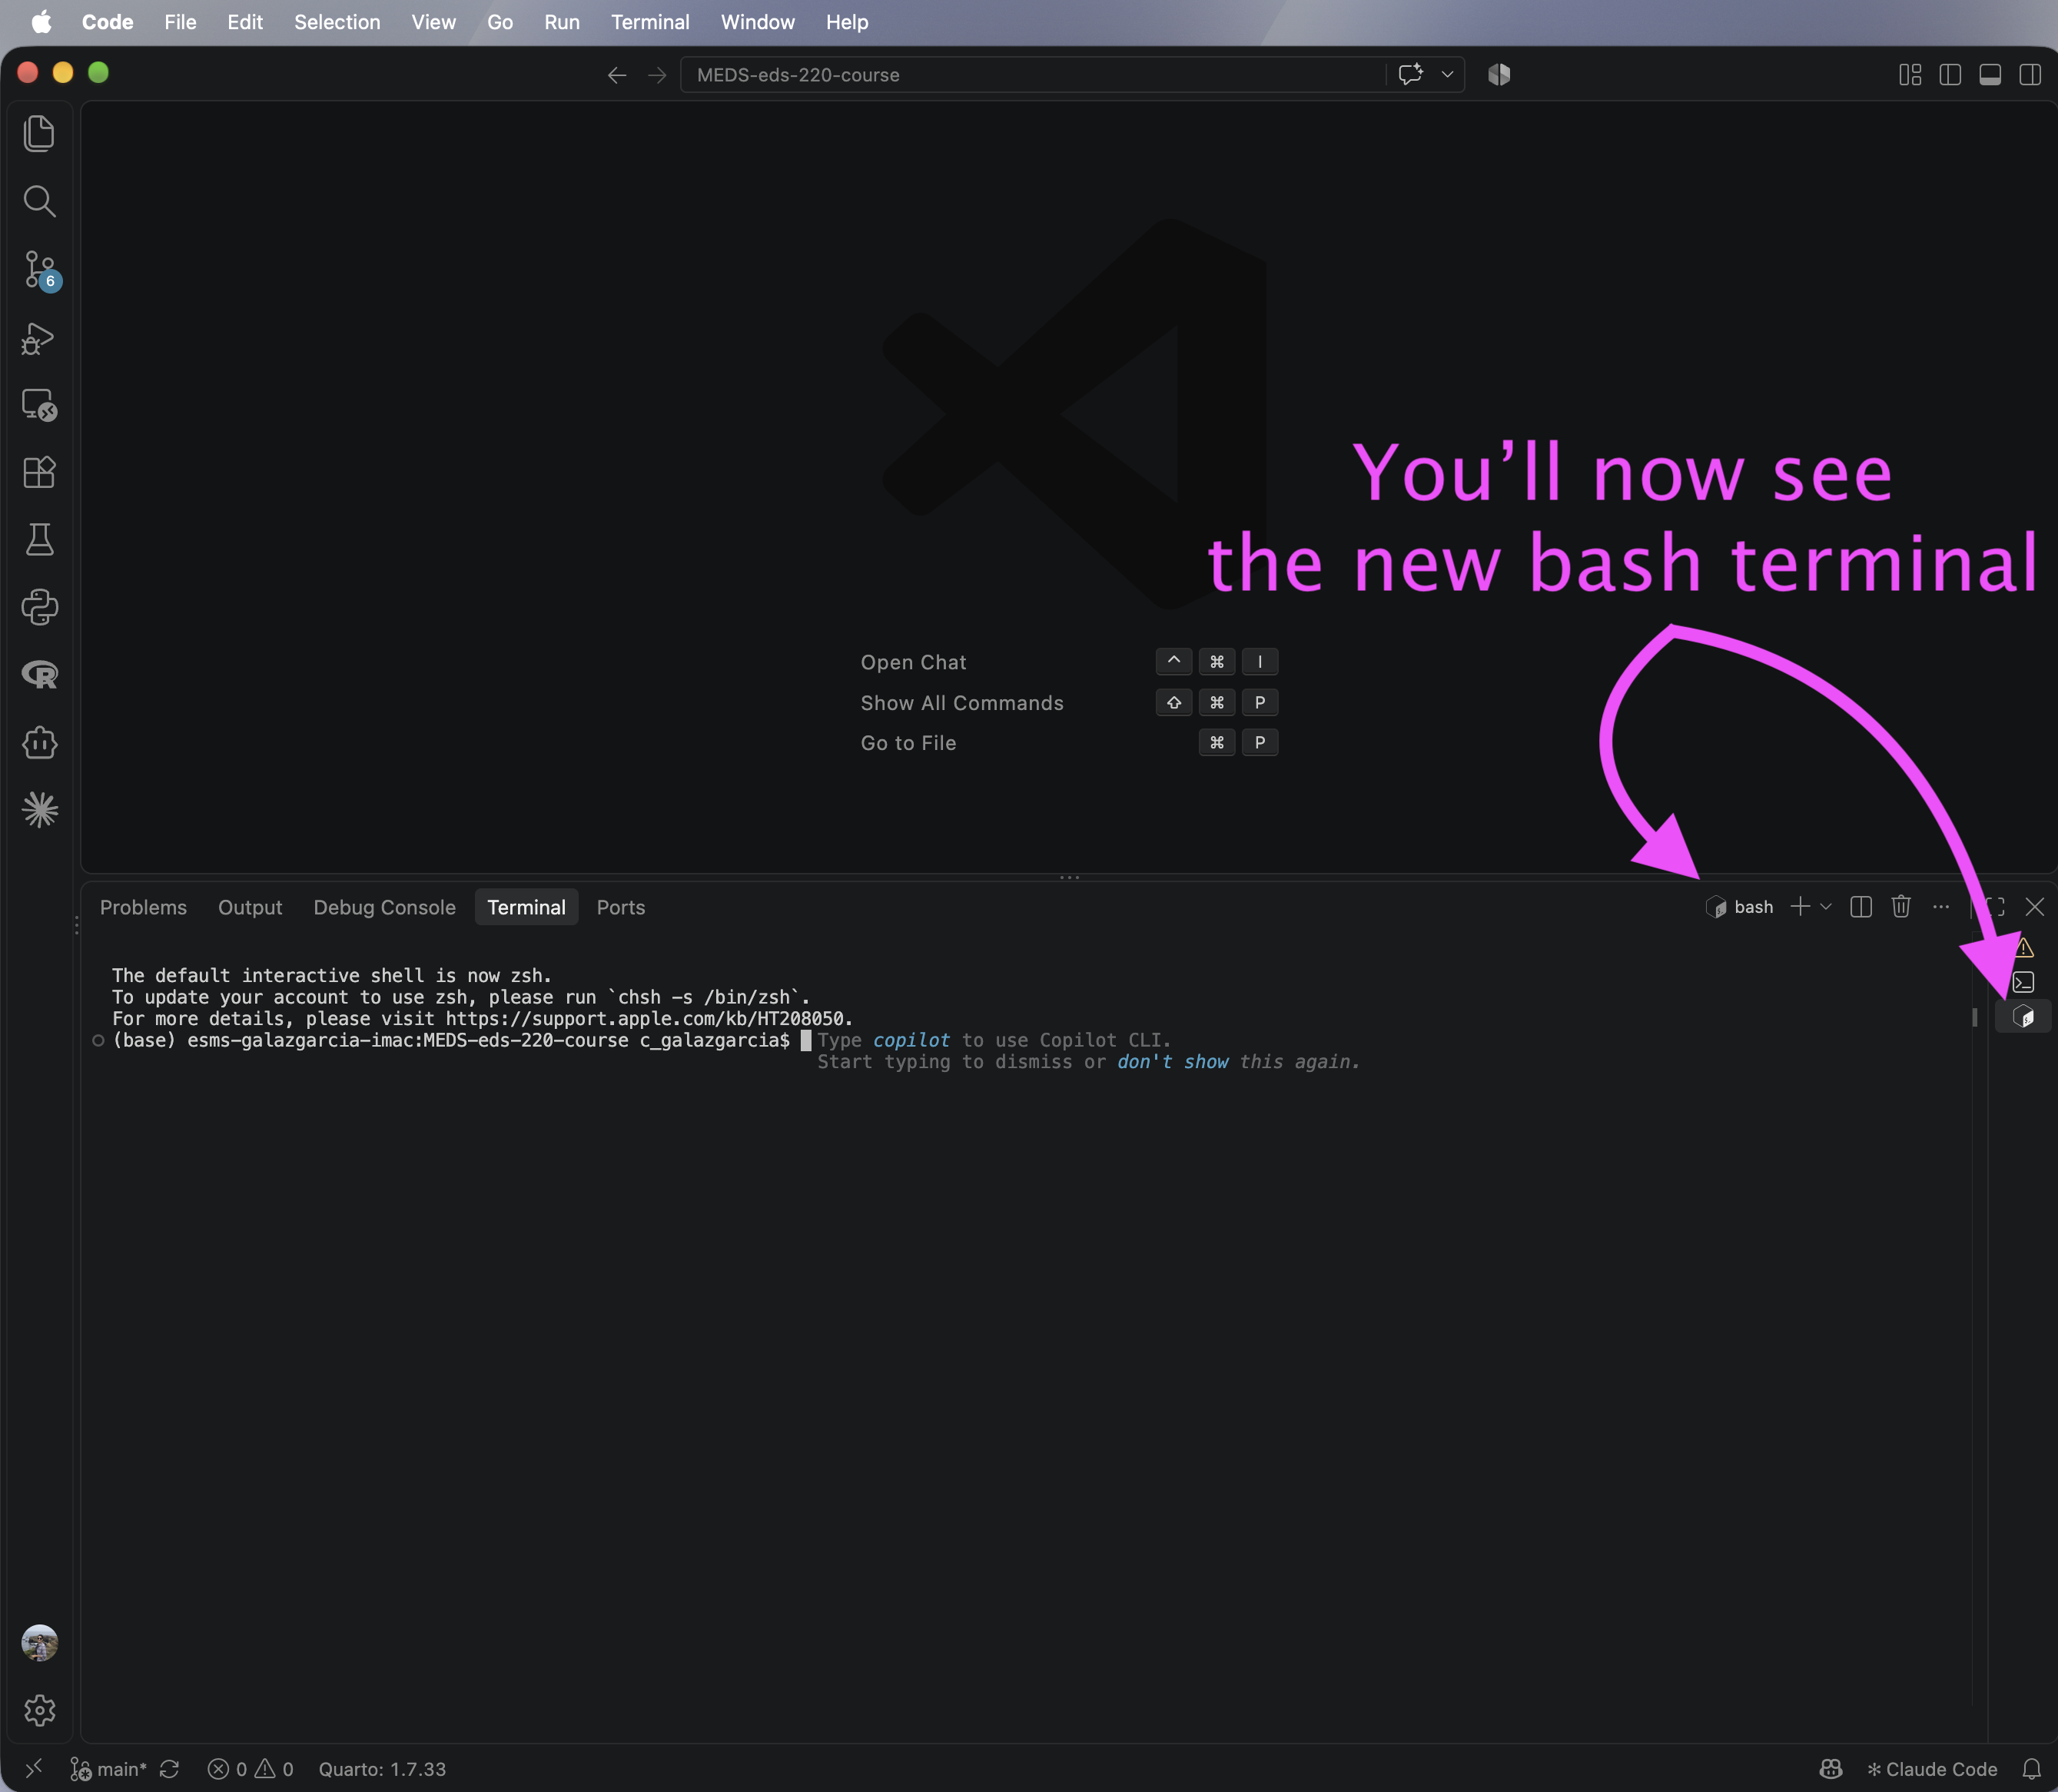
- Add a new bash terminal in it.
- Confirm git installation by running
git versionin the terminal. If git is installed you will get something similar to
git version 2.33.1- If you don’t get a similar output, install git by following the MEDS installation guide.
Initialize your repository
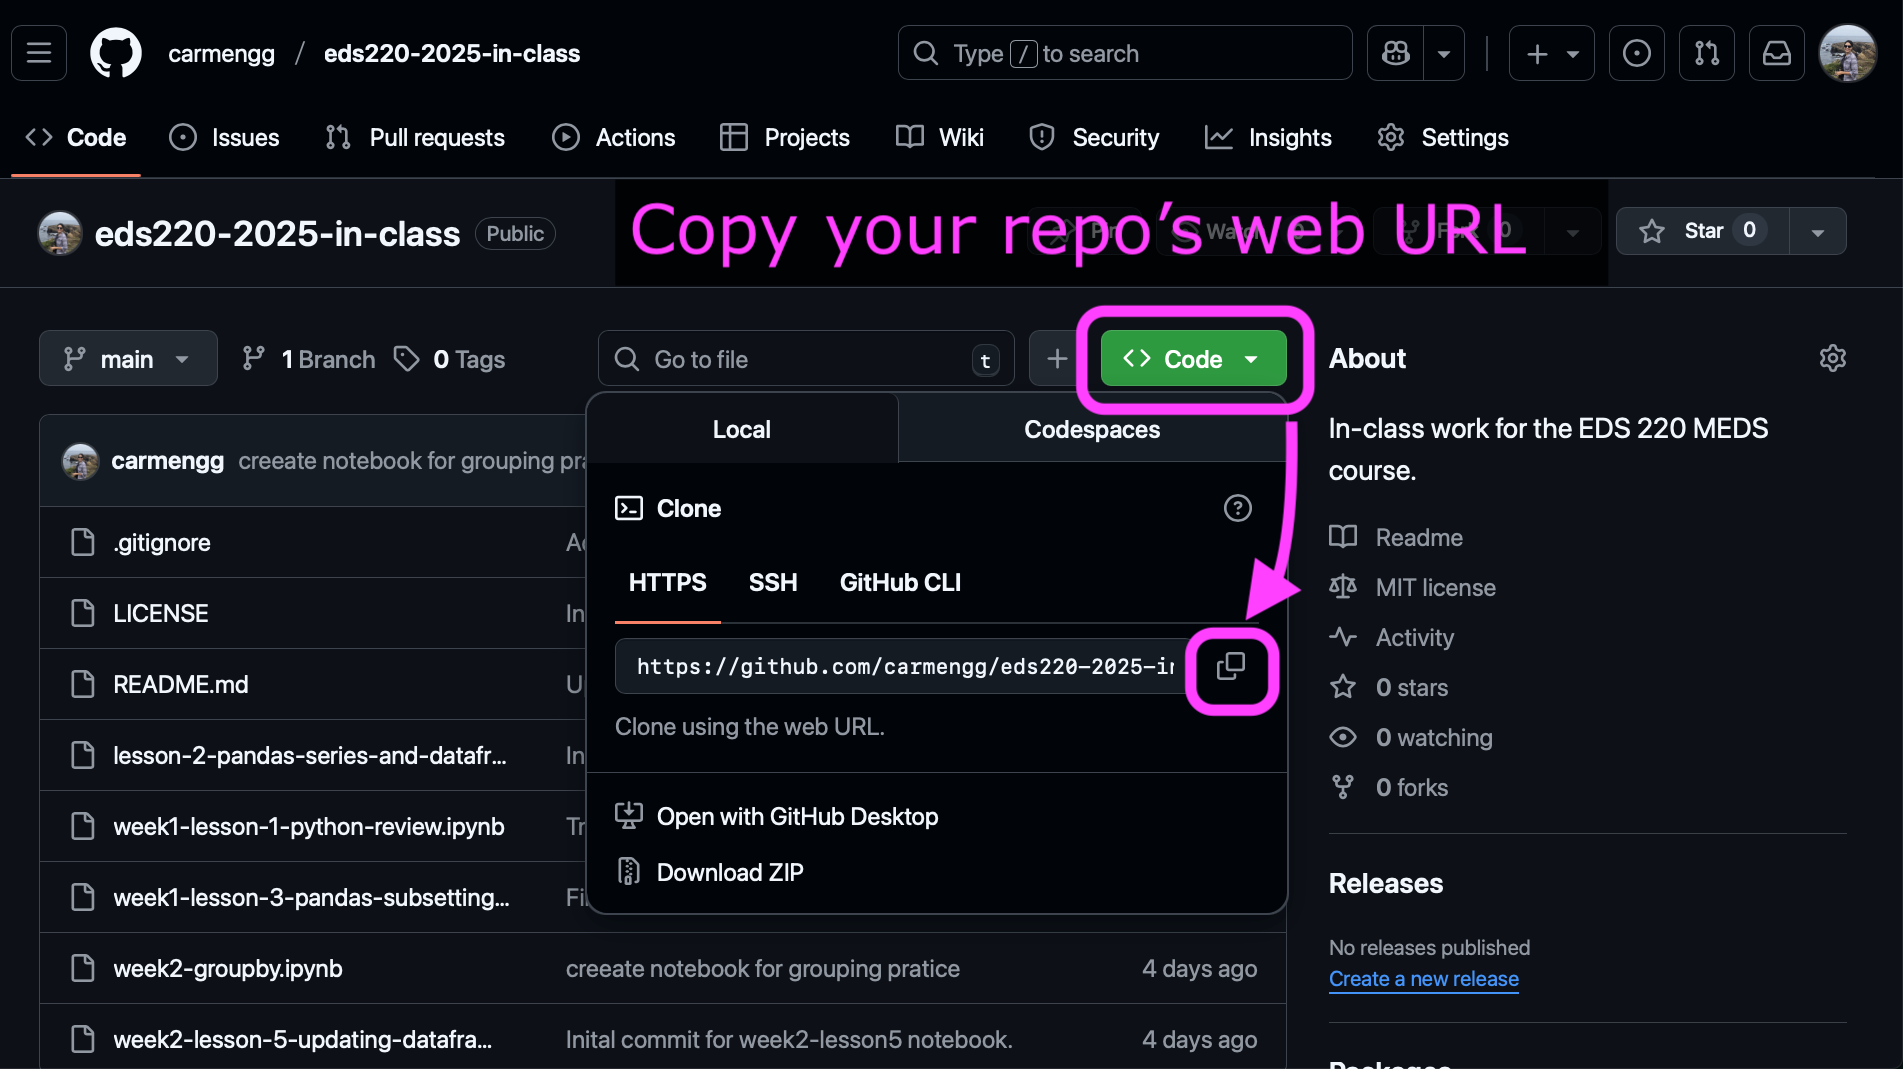
- Clone your
eds220-in-classrepository inside theMEDS/EDS-220directory. You can do this using the terminal or using the VSCode interface:
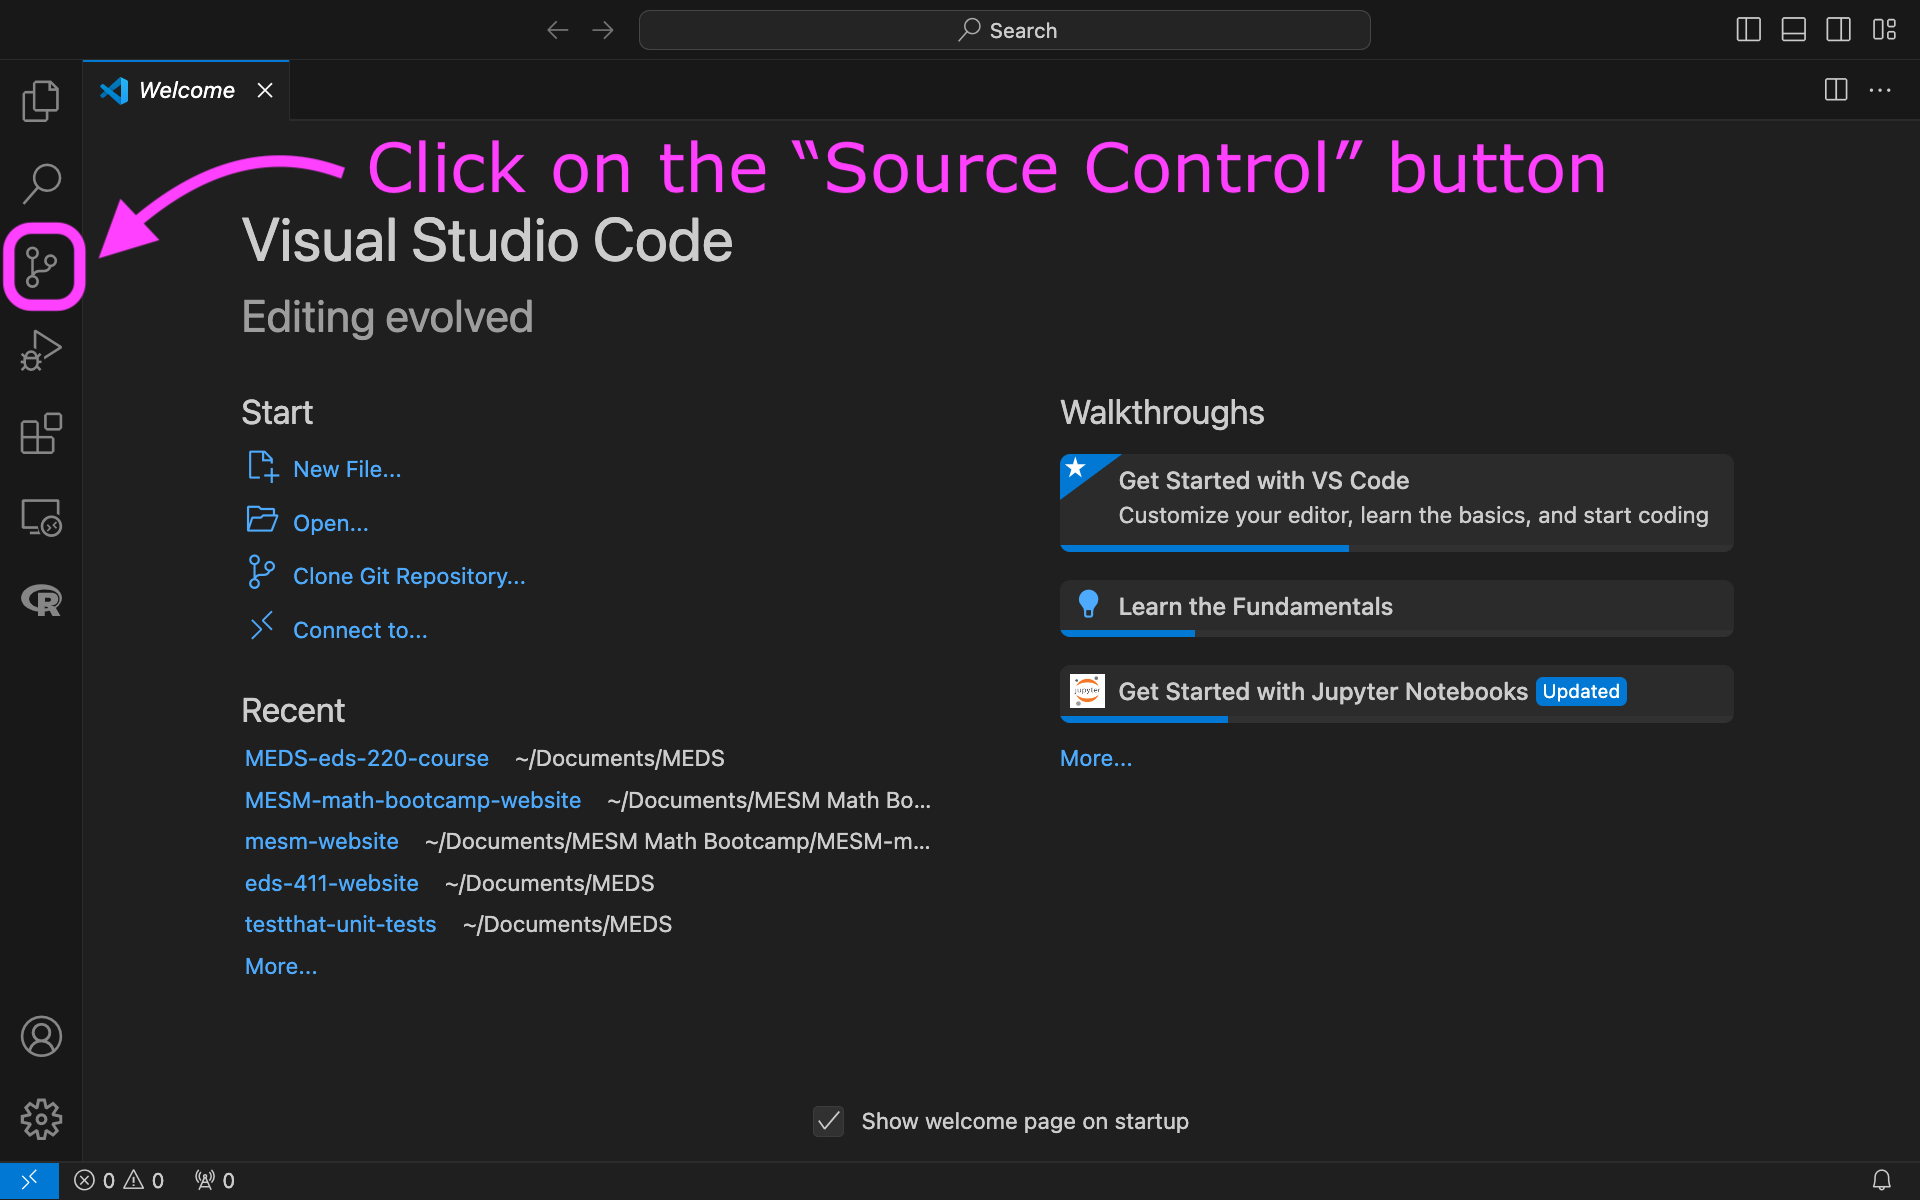
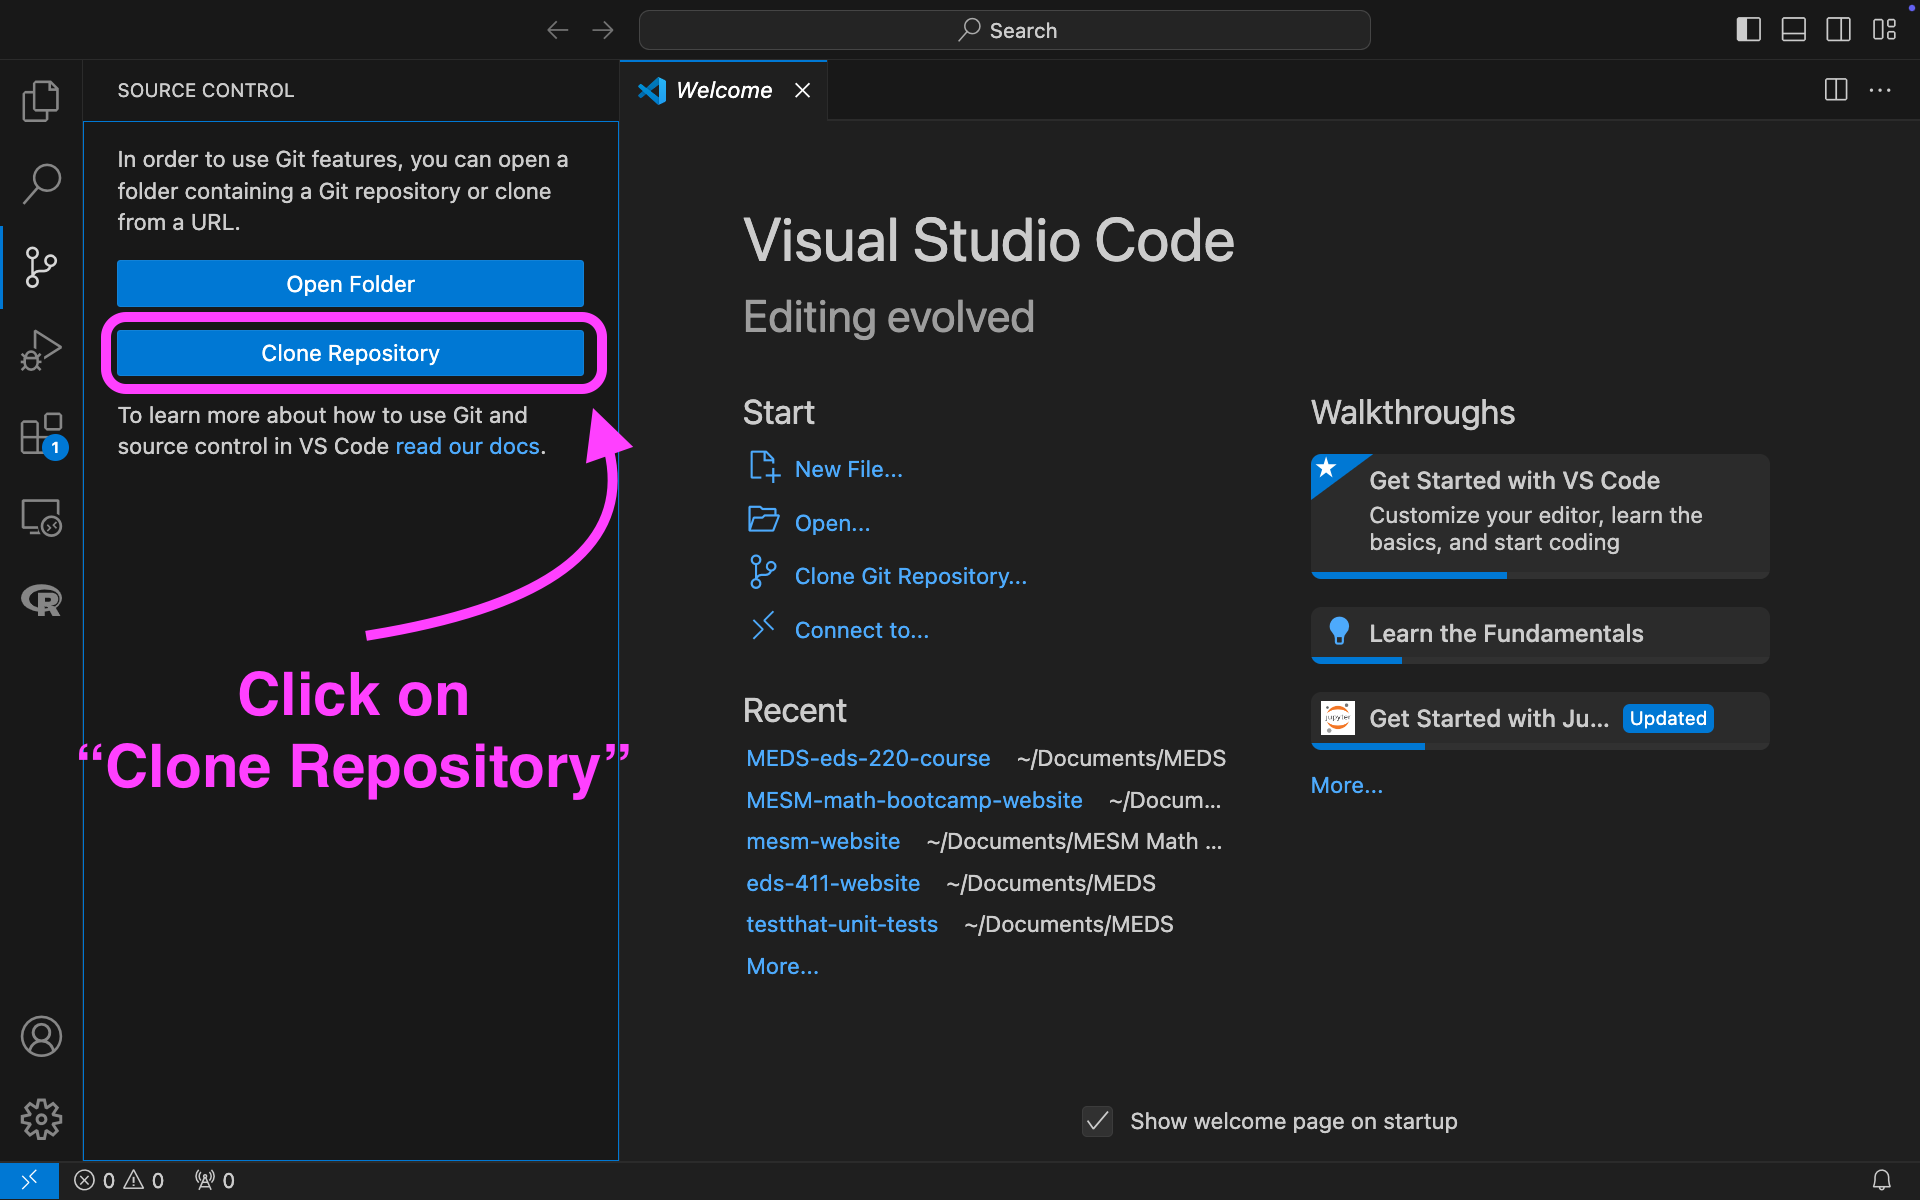
Configure git pull.rebase
- Configure the way git handles
git pullby running in the terminal:
git config --global pull.rebase falseThe --global option saves this setting for every repository on this computer, so you only need to run it once per computer.
- Verify that your configuration was successful by running:
git config --global --listThis command shows you all the settings git is using at the moment. Your output should look something like this:
user.name=carmengg
user.email=c_galazgarcia@ucsb.edu
pull.rebase=false
If you see pull.rebase=false it means the configuration was successful.
Check conda installation
- Confirm your conda installation by running
conda infoin the terminal. If conda is active you will get something similar to
active environment : base
active env location : /Users/galaz-garcia/opt/anaconda3
shell level : 1

[...]

UID:GID : 502:20
netrc file : None
offline mode : False- If conda needs to be added to the shell profile, follow the troubleshooting steps in the MEDS installation guide within a bash terminal (not Powershell if you are on Windows).
Install the VSCode Python extension
- Install Python extension to VSCode:
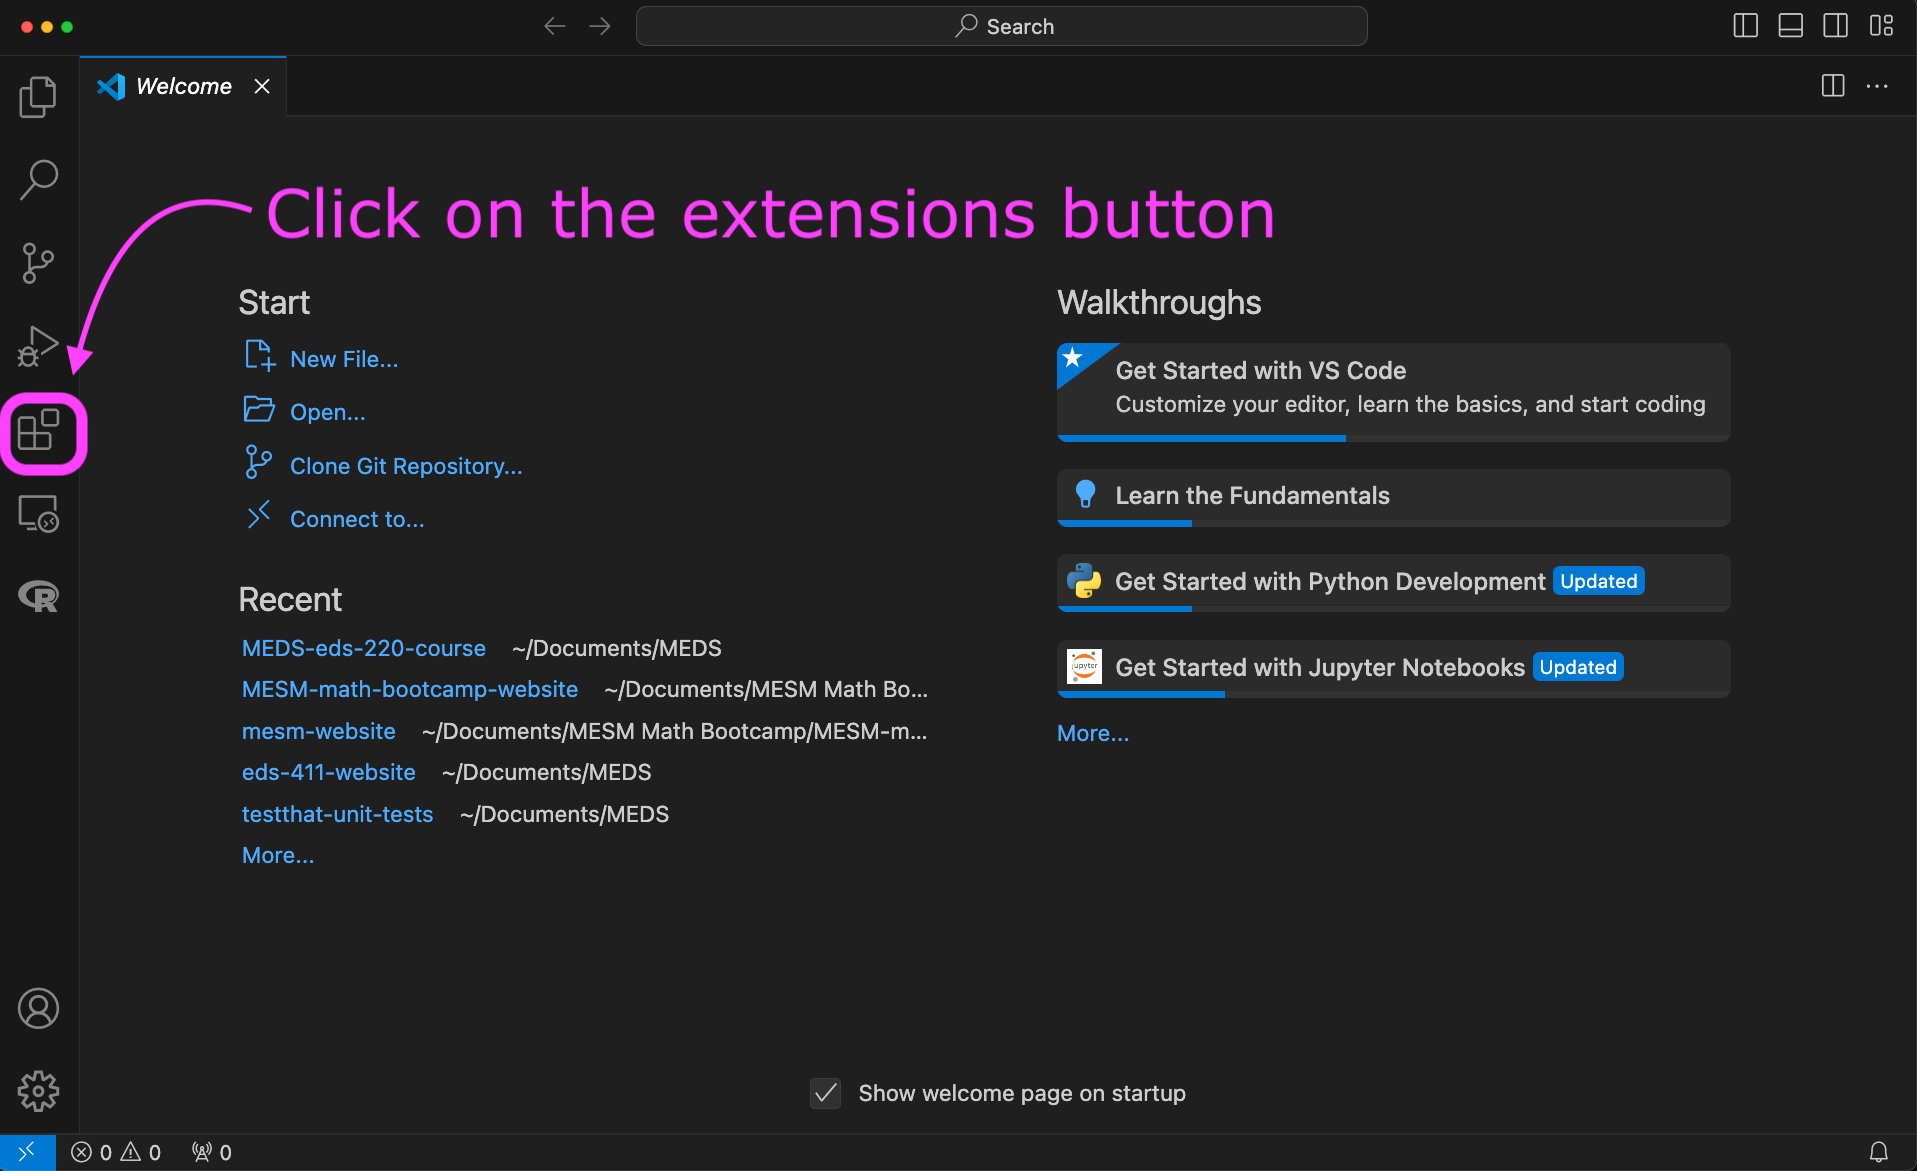
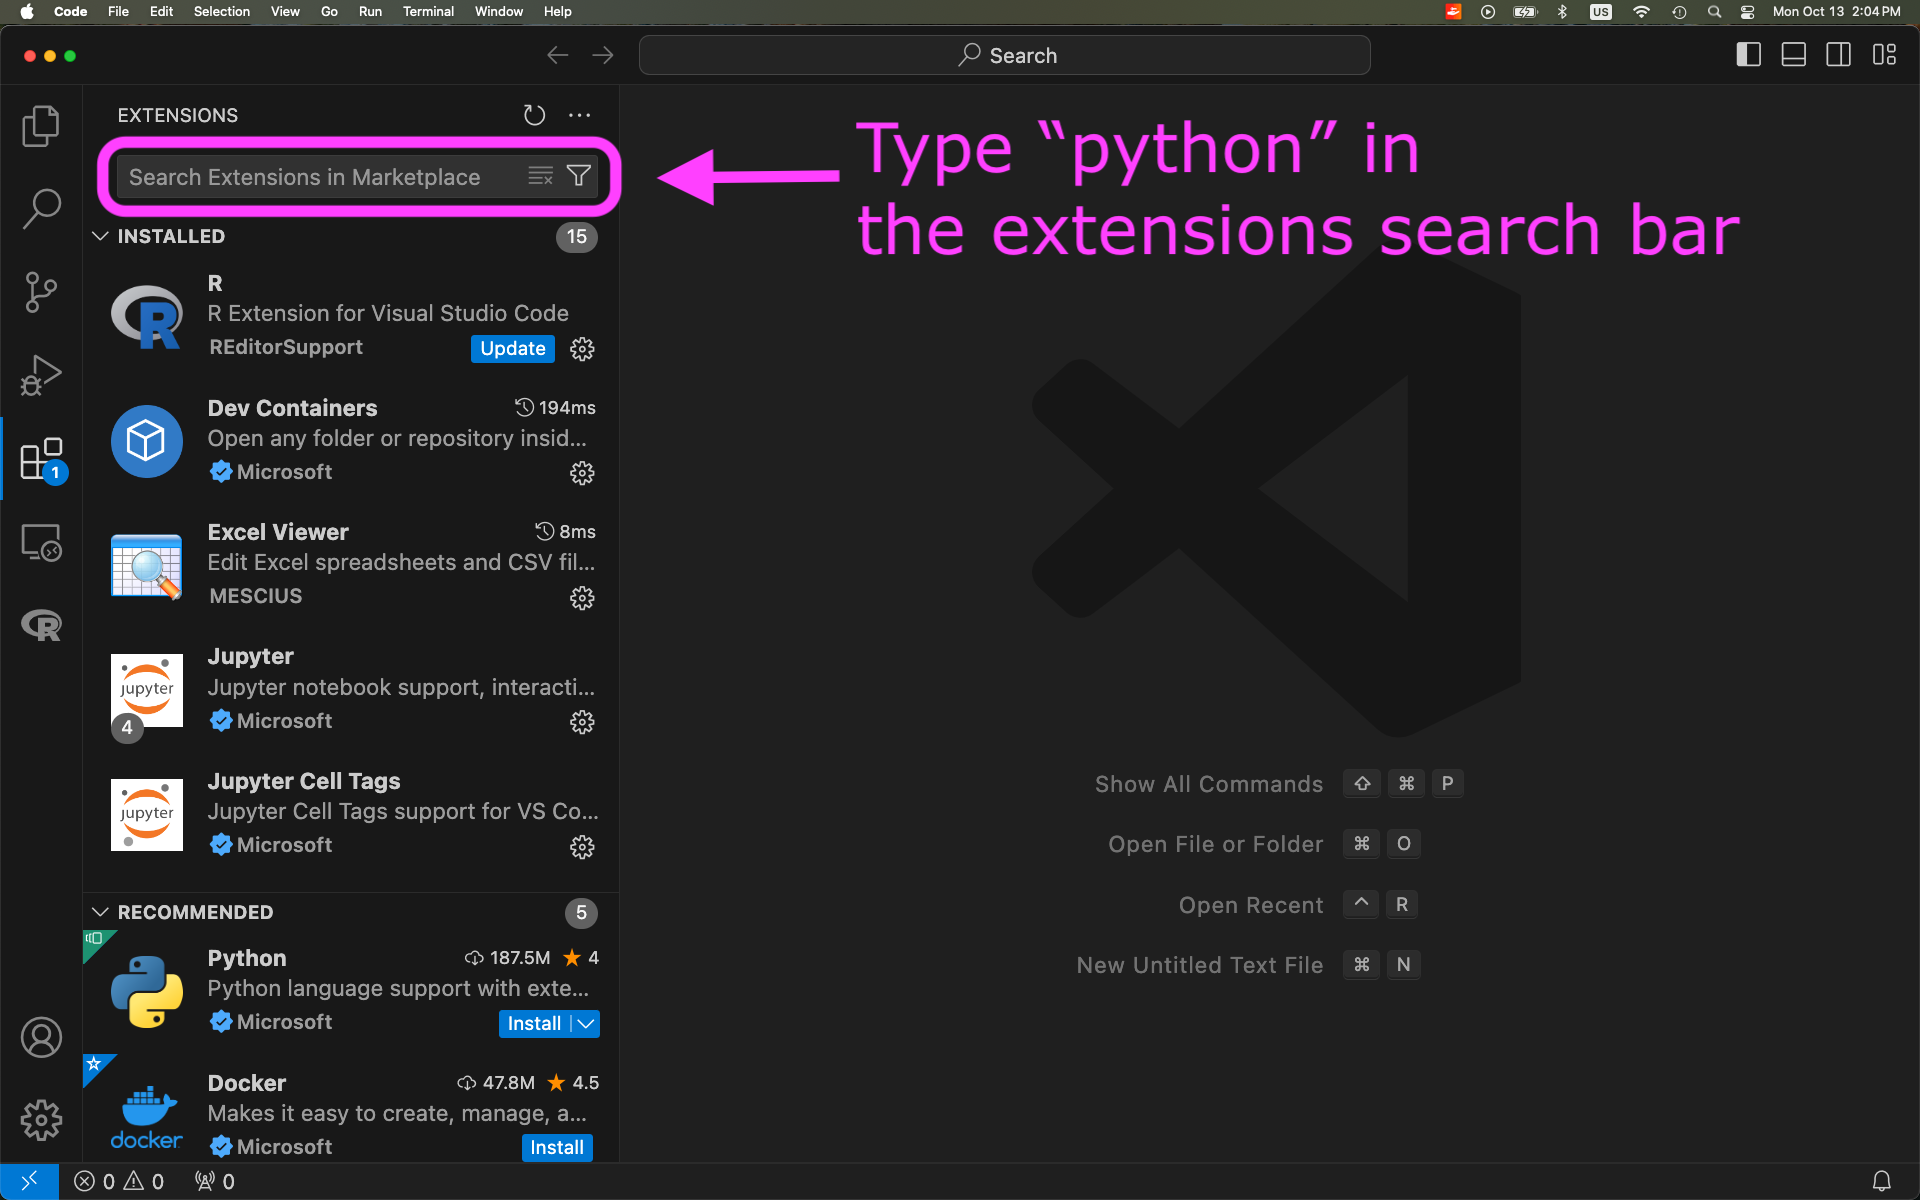
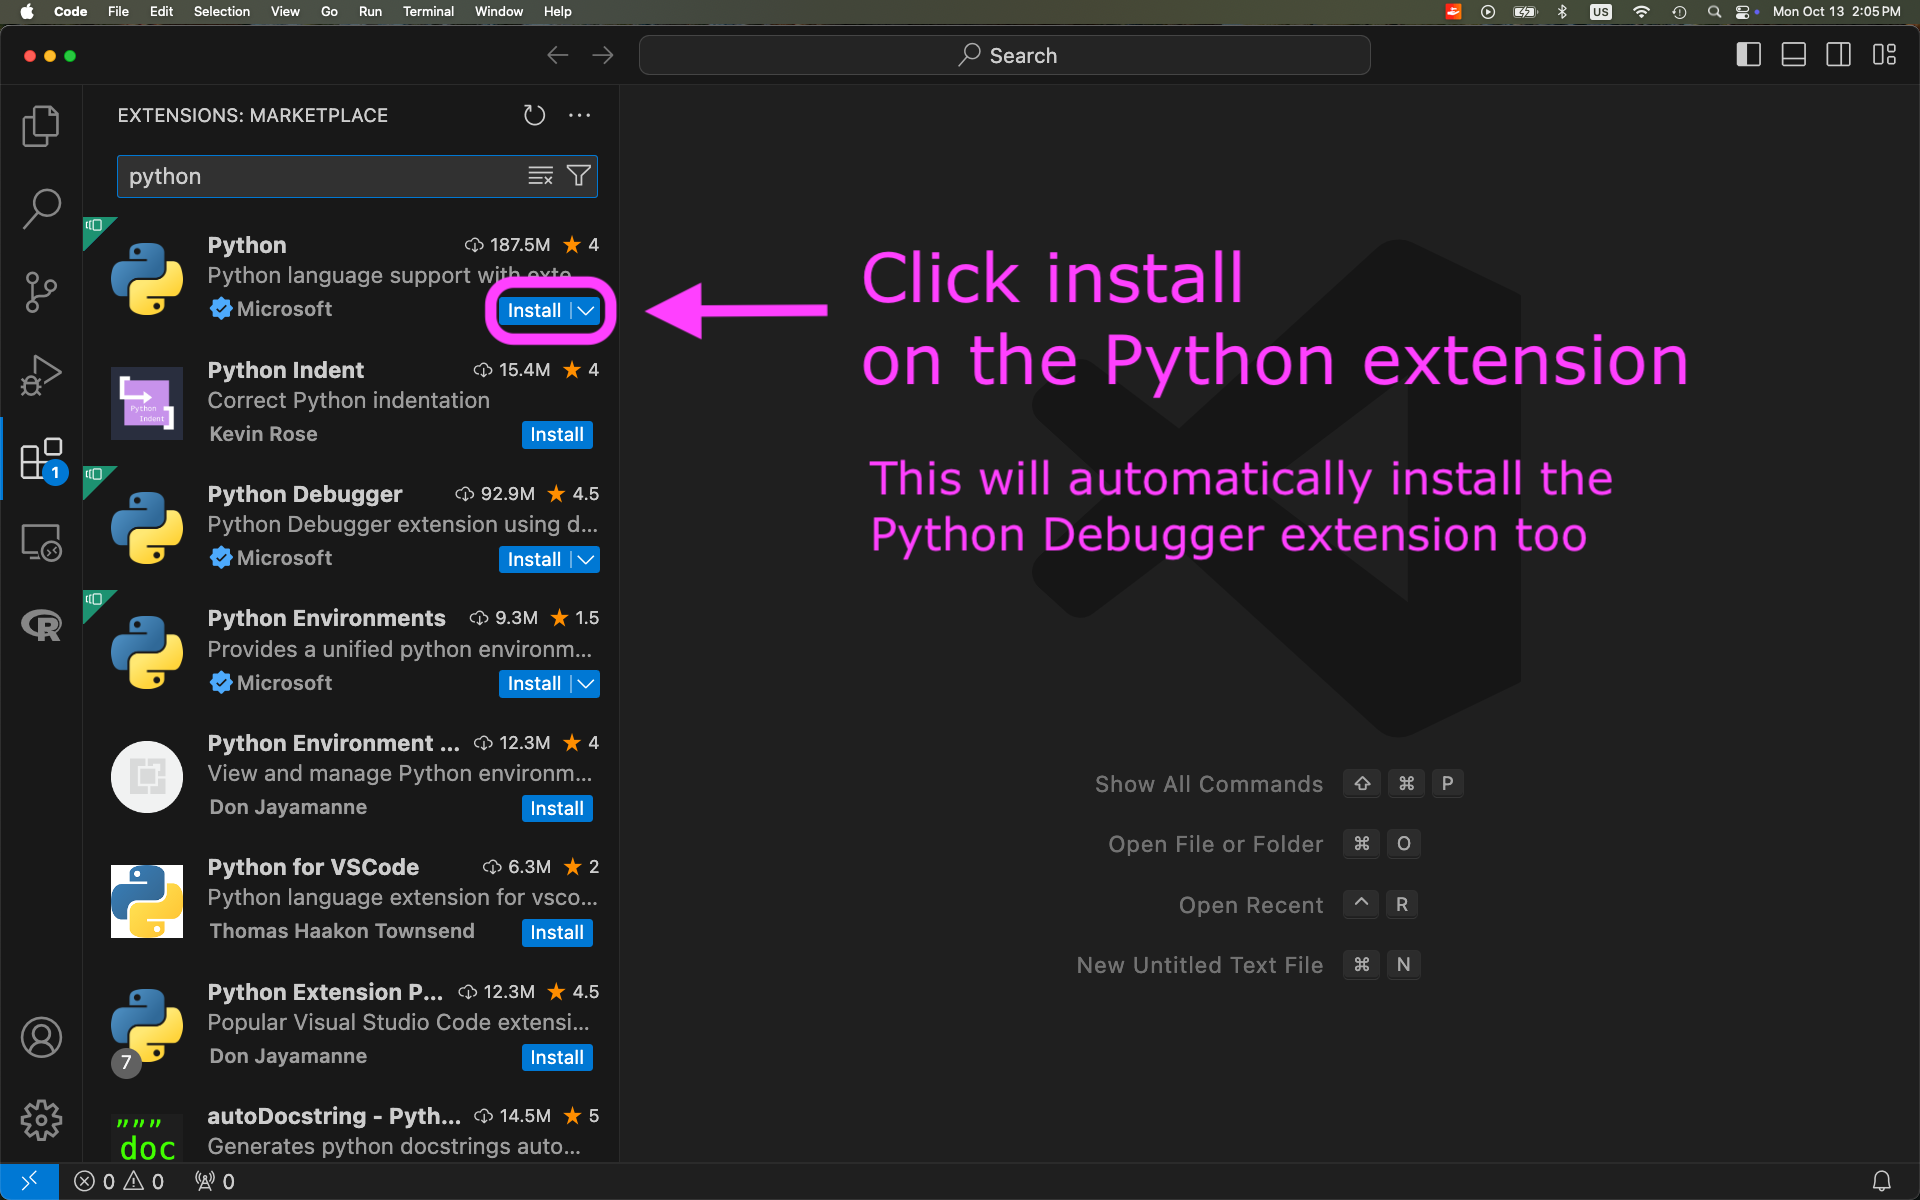
- Install the Jupyter, Quarto, and Data Wrangler extensions to VSCode. Similar steps as above!